Blog

Playing with Resin


Not too long ago, I asked on our Facebook page if there was anything our subscribers wanted to learn more about. We had a response for information on alcohol inks, specifically on yupo paper and tiles. I used to play a lot with alcohol inks when I was paper crafting, and I thought this was a good request for me to take on because I already had some experience with them. So I went looking for a cheap set of inks on Amazon to play with, but something jumped out at me while I was browsing my options…

You can use alcohol ink to color two part resin.

Welp, that sent me right off on a tangent. I already had two resin kits sitting on my shelf that I hadn’t gotten up the nerve to try out. So as soon as the inks came in, the first thing I did was break out the resin.

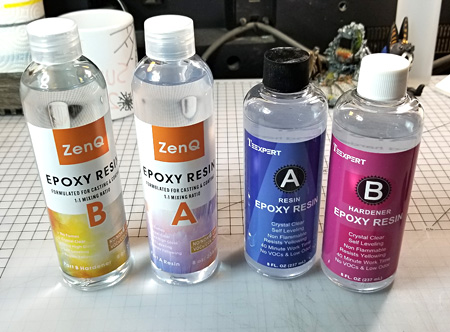
When I went resin shopping, I didn’t know much about it. I relied on user reviews and price to decide what to purchase, and in the end went with two different brands: ZenQ and Teexpert. Both are low/no odor, which was also important to me because I want to be able to use the resin during the cold Wisconsin winter. I tested out each brand by making a one ounce batch, and really found no difference between the two. With both it was recommended that you measure by volume and not weight to get the best cure, neither smelled at all while I was mixing them, and both cured in about the same amount of time. In some of the reviews people mentioned having curing issues, but I didn’t have any problems at all, even though I’m a total noob. So just read and follow the directions and you’ll be fine.

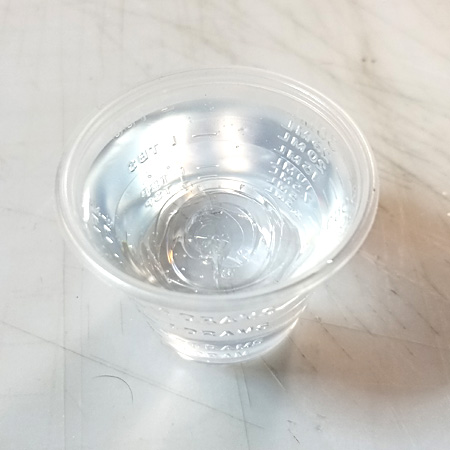
The cliff notes version on mixing, is that you pour equal amounts into separate cups, then mix them together into a third cup. Of course, being the rebel I am, I didn’t do that. The measuring cups provided in the kits are plastic, and it seemed silly to throw three in a landfill when one would suffice. I just used the lines on the cup to measure a half ounce of each part into the same cup and started stirring.

When you first mix the two parts together, you’ll see a clear marbling, and then the mixture will go cloudy. You’re going to want to mix until it’s clear again with no marbling. Make sure you’re scraping the sides and the bottom while you mix, the whole process takes about 3-5 minutes, and then you’ll be ready to pour.

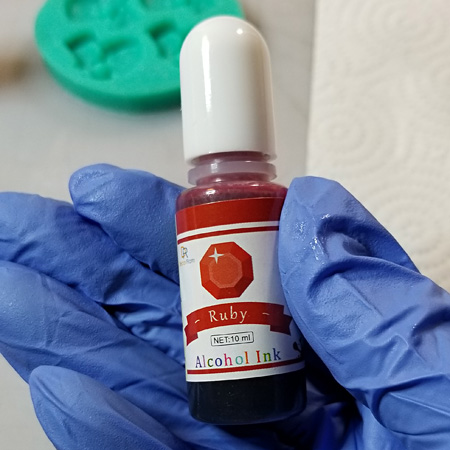
When you’re working with resin and alcohol ink, you need to wear gloves. The resin isn’t good to get on your skin, and the alcohol ink stains everything it touches.

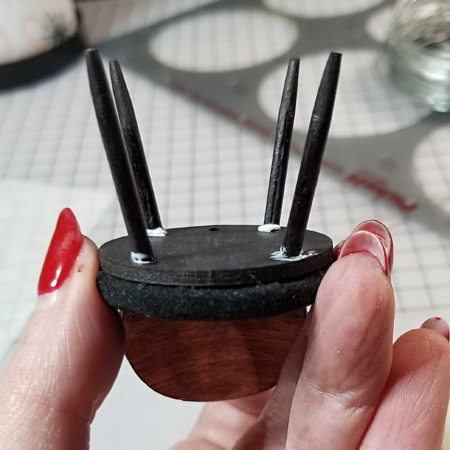
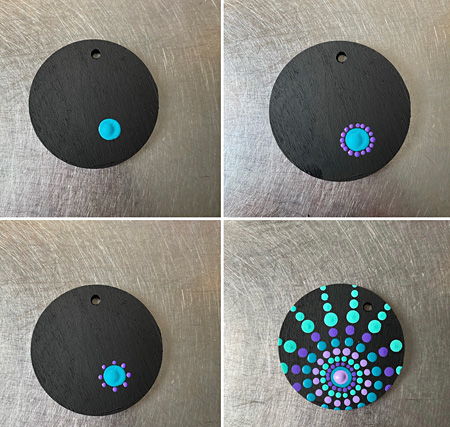
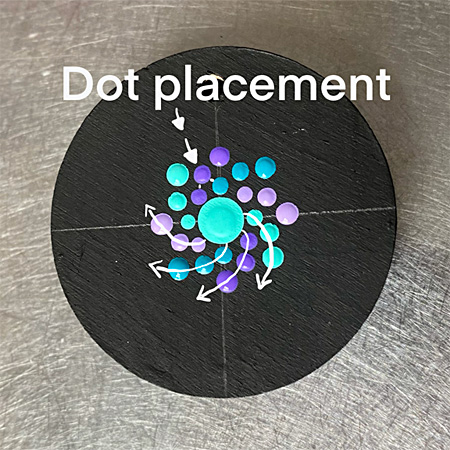
You can add the ink directly to your resin to color it, but I was just playing and wanted to see what kinds of effects I could get. Instead of coloring my resin, I dropped ink down the sides of my molds and poured the resin on top of it. Some I stirred the mixture with a toothpick, others I just let sit and do what it was going to do.

Then came the hardest part, waiting a day to unmold my creations.

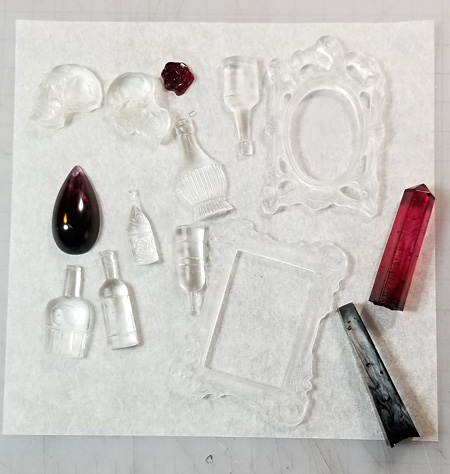
As you can see, each brand of resin made about the same amount, there was no change in the volume after they were mixed. What surprised me was that they weren’t hard when I unmolded them. They weren’t sticky anymore, but all of them were bendable. So I left them to sit out of the molds for another day, and in that time they all hardened up.

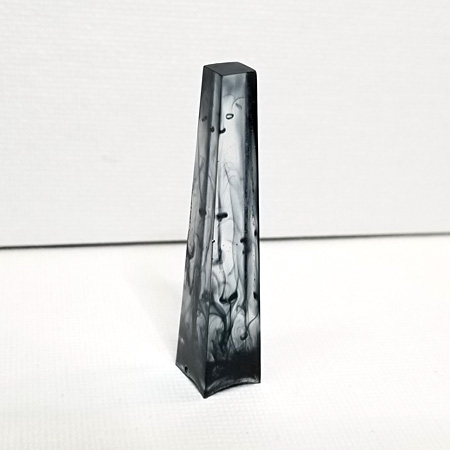
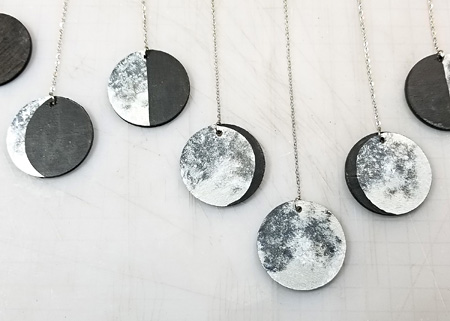
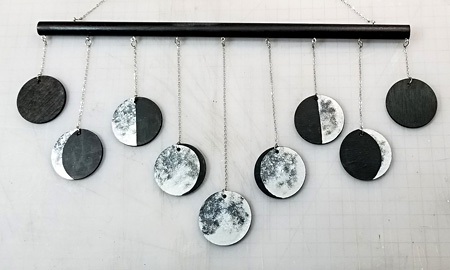
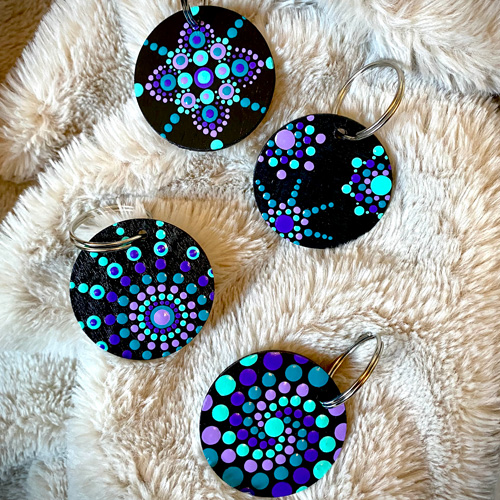
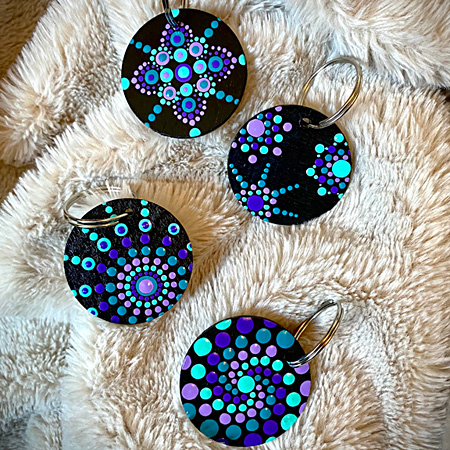
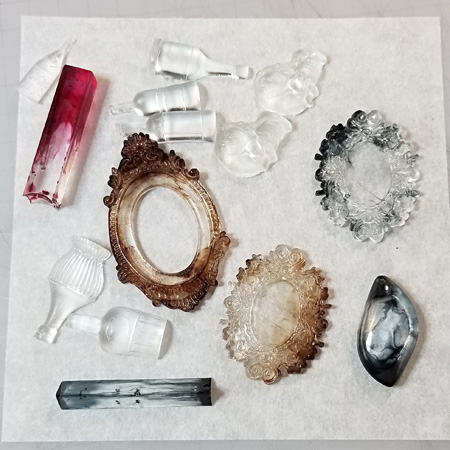
Some of the swirls in them were really stunning, and it was so exciting to unmold each item to see how they all turned out. It really made me want to make more because it was so much fun!

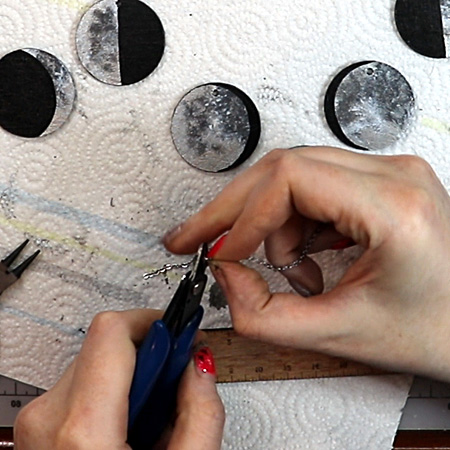
I made a bunch of clear pieces as well as colored ones, because I wanted to try some different techniques on the resin. So now that all of my frames and bottles had cured completely, it was time to start making them into cool things!

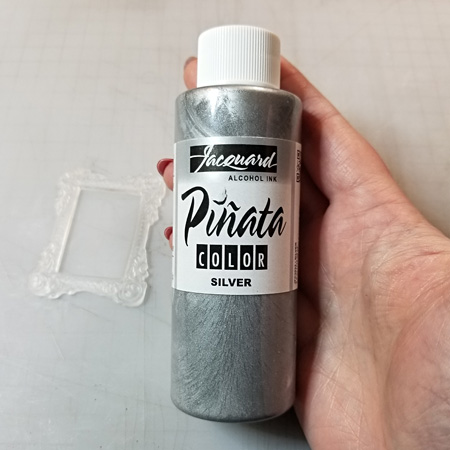
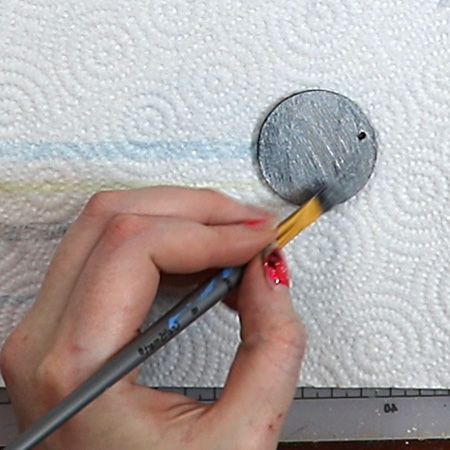
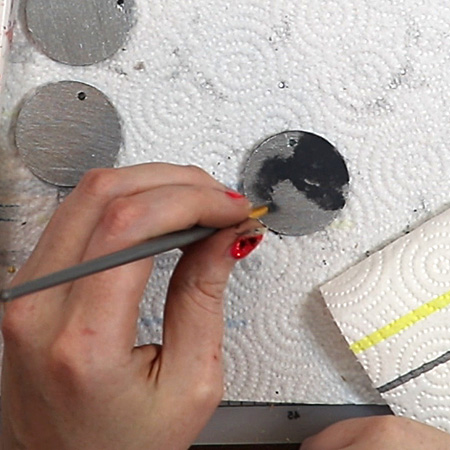
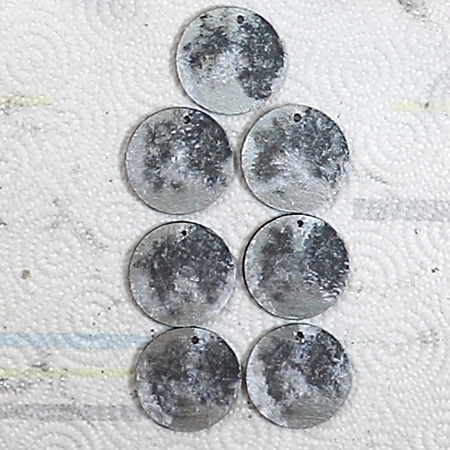
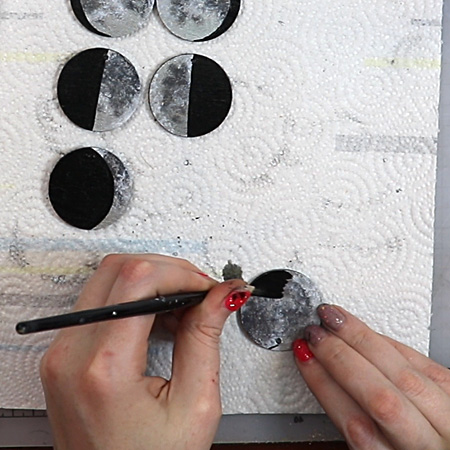
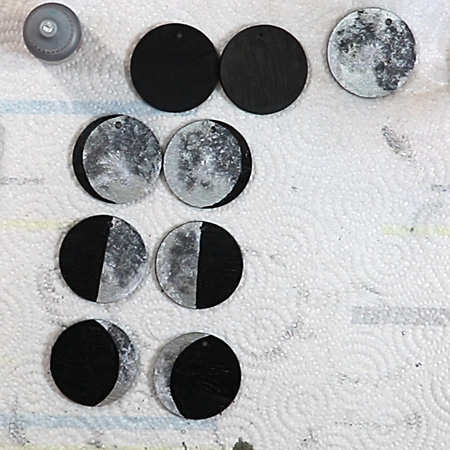
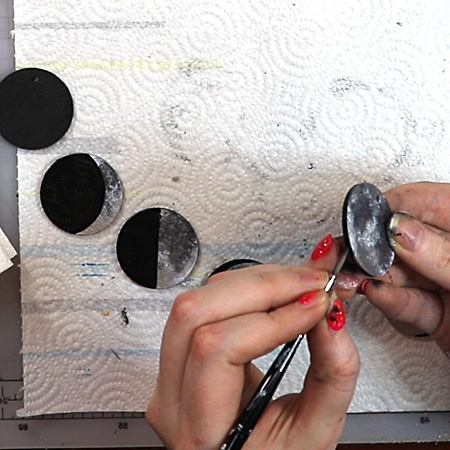
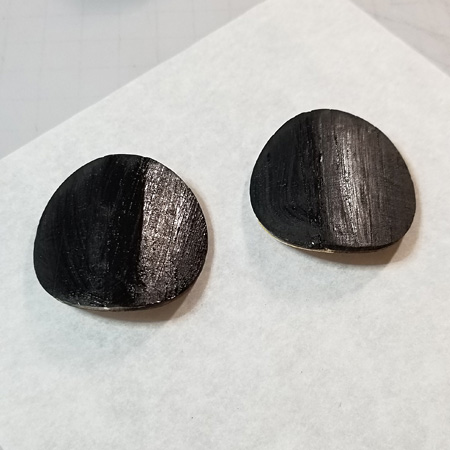
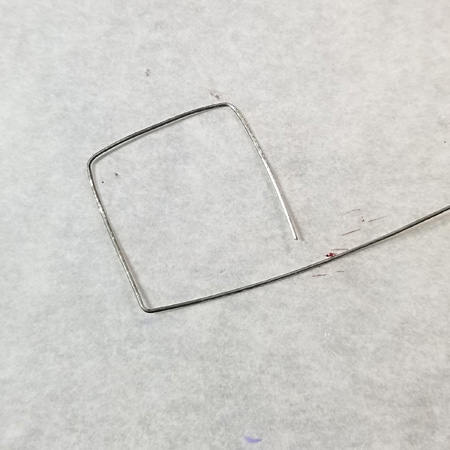
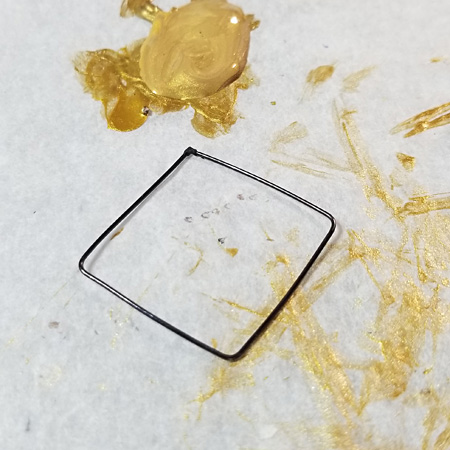
I had also purchased some silver ink because the alcohol ink kit I got didn’t have any metallic in it. So the first thing I tried was just straight painting with alcohol ink. After it dried, I used a black acrylic paint wash over it to give it some depth, and it turned into this stunning frame that looks like it’s made of metal.

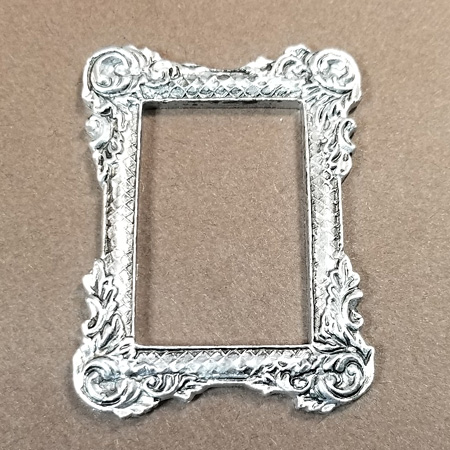
Most metallic paints look grainy when they’re dry, but the alcohol ink doesn’t! It’s a great way to make something that really looks like it’s made out of metal.

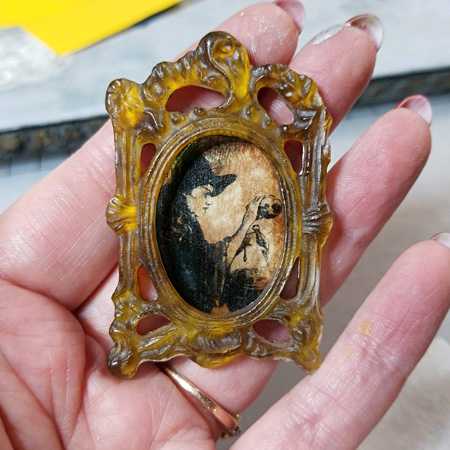
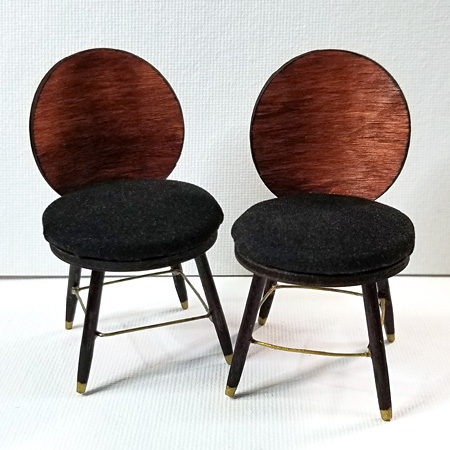
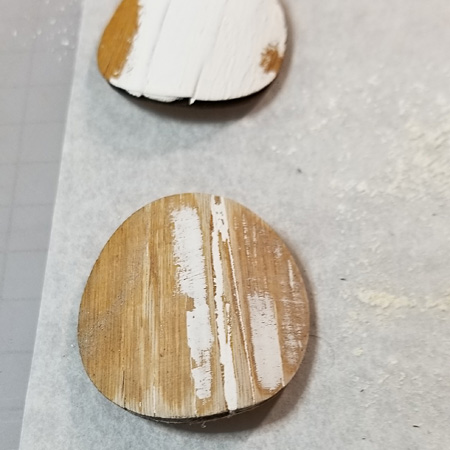
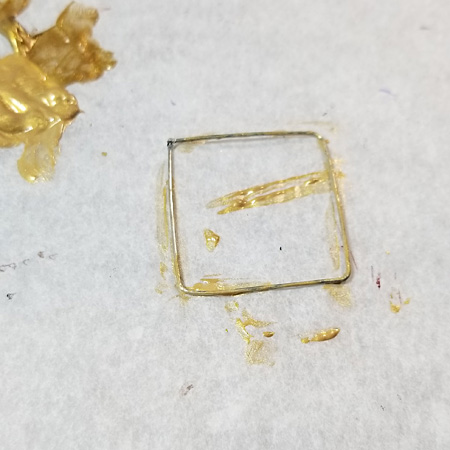
Next I took one of the clear resin frames, and painted the inks onto the back. I used yellow and brown inks, dabbed on in layers, and once they were dry went over it with the silver ink to make it so the frame was opaque. The technique resulted in this dimensional art deco look that glows when the light hits it.

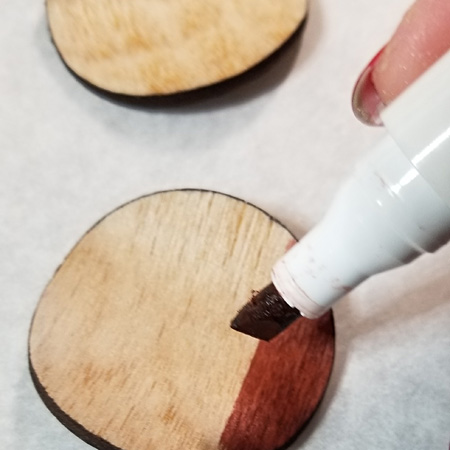
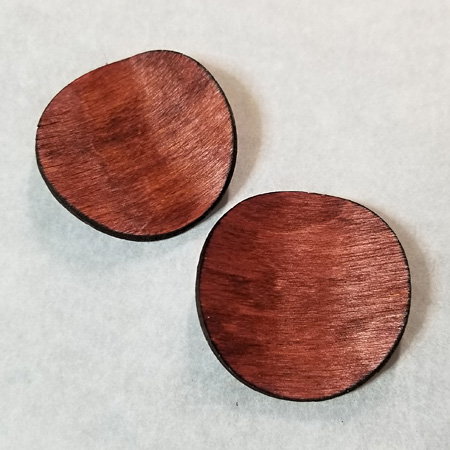
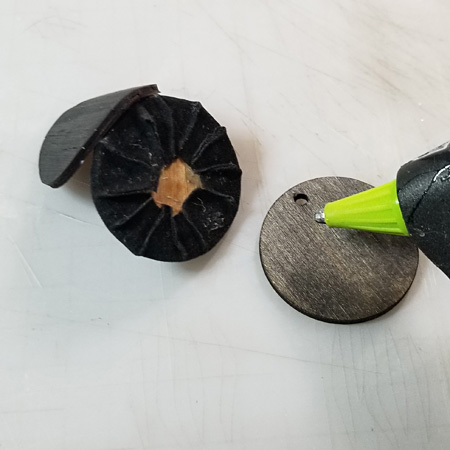
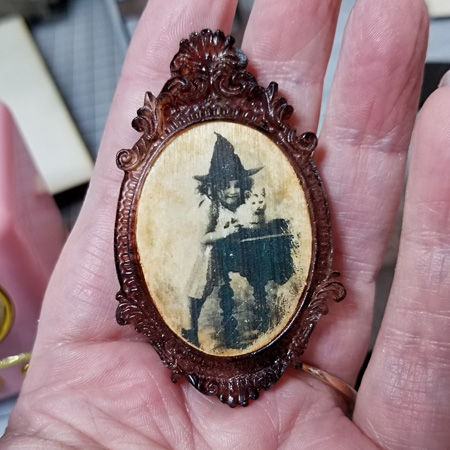
Lastly was a frame that I marbled in the pour. The frame was perfect as is, but I wanted to play up the antique feel of the portrait. I did a Mod Podge image transfer onto wood, and antiqued the edges with some of the brown alcohol ink diluted with some rubbing alcohol to add to the age.

Now I know this isn’t what my subscriber asked me for (if you’re reading this Jeanne, I promise I’m working on the yupo paper techniques), but I wanted to share it with you because it’s just so much fun.  I was really afraid to work with two part resin, because I’d heard stories of catastrophic failure, but it turns out it was actually really easy. Just read the directions, start small, and you’ll be fine. I can guarantee I’ll be doing more of this craft in the future.

Does resin scare you? Why? Have you made anything with resin before, and if so, was it a success or failure? Let me know on Facebook or Instagram, I’d love to hear about your experiences!

*This post contains Amazon Affiliate links

Something New


Most of the things I’ve posted here on Sketchyville are my dot mandala creations but I thought I’d share with you another art form

I really enjoy doing. This is something I’m still learning about but it’s what I’m doing almost anytime I’m sitting on the couch relaxing.

Drawing and doodling is something I’ve done since a super young age so, a few years ago when I saw people’s creations on an app called procreate I was immediately intrigued. My parents being the supportive, amazing humans they are, got me an iPad for Christmas (thanks guys!). Literally a few hours after I opened it I was on it attempting to draw portraits.

These aren’t your regular portraits though, they’re a little creepy to some people but to me they are fun and different. They’re called faceless portraits. I know, sounds weird but just stick with me here.

This was the first one I did and it took me probably 2 days to complete because Procreate has quite the learning curve. So much so I was wondering when I became illiterate in technology. I thought it may have been a total waste of time and money at one point but I was determined to get it figured out.

Since Christmas I’ve made countless faceless portraits of friends, family, and even some of their furry friends. Eventually I would like to be able to do these as commissions because it brings me so much joy getting to show people their loved ones/themselves and see their reactions.

More recently though, I’ve slowly tried my hand and introduced facial features into these drawings. The very first one I did was of RBG, of course, and the latest being of my family dog, Bodie. Procreate has tons of brushes that come with the app, but there’s also some websites where you can download free ones which is where I got the “fur” brush I used for Bodie’s portrait.

So, what do you think of the faceless portraits? Creepy? Trendy? Or do you prefer regular, classic portraits? Tell me on Facebook or Instagram who/what you think I should draw next!

Taking Risks


Sorry in advance, but this blog post is probably a bit less colorful than the posts I usually write. Don’t worry, there will still be lots of pretty pictures though! 

I’ve spent the last week working hardcore on getting products set up for my Etsy store. Some, if not all of these products will also be listed for sale on Sketchyville soon, so keep an eye out for those. This is all very exciting and also very scary for me. It’s hard to escape that voice in the back of my head that says I’m crazy for this, that it will cost more than I’ll earn, that my art isn’t good enough, that I’m just going to be bugging my friends and family until they hate me… it’s so much that I honestly had to sit and stop for a second after I wrote all that. That fear can be paralyzing. I think sometimes the more I love something, the more afraid it makes me. There’s a fear of losing that thing, and a fear that I’m not deserving of it. I know I’m not the first person to experience that kind of overwhelming fear, and I know I’m not going to be the last. I will probably be experiencing that fear for the rest of my life. And I could give up. I could set this all aside and never experience that fear again. Or I can push through it. 

Sometimes, when it comes to anxiety, there’s this moment where it all becomes overwhelming and I have to make a decision. I feel it when I’m looking up at a giant roller coaster and I remember that I’m terrified of heights. I feel it when I’m considering telling someone how I feel about them. I feel it any time I have to expose the way I really feel, honestly. I felt it before I set off on a two week cross country road trip with my best friend. In those moments, it feels like the anxiety will stop me in my tracks. In those moments, I have to decide if I’ll let it. Sometimes I do. I don’t always go on those roller coasters. Sometimes I keep my feelings inside of me, and I convince myself that it’s better that way. That the risk wasn’t worth the reward. That the reward wasn’t worth the cost. 

But other times, I take a step forward. And it’s usually as simple as that. I walk into the line for the ride. I step into the car. I speak… and once I’ve started I can’t stop. I just keep going. And when it’s all done I find that my life is so much better because I took that step. 

I’m at that moment. I’m taking that step, because I’ve never wanted something like I want to be able to make art every day. 

I’m just going to go on the record here and note that none of that is what I was planning on saying, though it’s been on my mind. I think the act of making art is something that can be very emotional. Let’s be honest, we all get that fear when we’re making something. Anne and I have talked a lot about it recently, how we hit this point when we’re making something and we need to try to do something we’ve never tried before and it feels so risky, like we’re going to ruin the work we’ve put in up until that point. Art is all an exercise in pushing past that moment, because it’s the only way we can get better. We have to take risks, in life and in art. It’s the only way to keep going. 

Well, that was not where I was expecting this post to go, but I did promise you pictures. So, here are some of the things I’ve been working on this week!


And while I have you here, if you’re interested in seeing more of my design work that doesn’t always make it onto here, I’m on Facebook as Fire Eyes Design, and Instagram as @fire_eyes_design


Check One Off


A couple of weeks ago I told you that I had to finish a project before I could start a new one. I chose the easiest one to complete, and estimated it would take me about a week. I was wrong, it took me two weeks. Mostly because actual w*rk kept interrupting my craft time.

How Rude!

Since last weeks blog post was a doozy, I thought today I would just share pictures of the finished project and tell you a little bit about the house I made.

When our kids were younger, one of them really liked a cartoon called Foster's Home for Imaginary Friends, and we used to watch it with them quite often. John enjoyed it so much that the kids used to buy him toys from the show, that he still keeps on his desk.

Then a few years ago Hulu added the whole series to their library, and we re-watched it a few times for a bit of nostalgia. It's just a really cute, lighthearted cartoon, that's good for when you need something mindless and fun to watch at the end of the day.

Last year for my birthday, John bought me a Cricut Maker. I had started working on my dollhouse during lockdown, and was making everything for it from scratch because I didn't want to go shopping for dollhouse furniture. The Maker, because it can cut heavy materials like basswood and matboard, became an essential tool for me to be able to make items for my dollhouse from materials I had on hand.

After designing and making a some groovy mid-century modern furniture for my house, I started to wonder if I could do something on a bigger scale.

I found a file on Esty for a dollhouse, shrank it down to quarter scale, and cut it out of some chipboard to see if it worked. If you follow me on Instagram, you might remember this bit of fail as I was trying to assemble it: GASP!

I did learn one thing though, I could cut a dollhouse with my Cricut.

No, wait! Two things... I could cut a dollhouse, and not to apply too much pressure when assembling!

When I got it put together, John asked what I was going to do with my prototype. I didn't have any plans for it, so he asked if he could have it to display his Foster's toys that the kids had gifted him though the years, because the little house reminded him of the one in the cartoon.

People... I did not want to give him a chipboard house to put on the shelf. I can do better.

So I told him I would paint it for him, to make it look more special than it did. I proceeded to eyeball the colors, picking reds, yellows and oranges out of my paint stash, and got to work painting.

You may already know where this is going.

It looked like a fast food joint!!!! Bright red, yellow and orange are the same colors you'll find at McDonalds and Burger Kings across the nation. It was awful. I trashed it.

And John was sad.

He's partly colorblind, so it looked good to him, but there was no way I was letting him set that on his desk and tell people I made it.

So I cut another house out of matboard this time. I decided it would be easier to paint the rooms if I painted everything before gluing it together this time, so I did a dry fit and once I had it assembled, I put it on my shelf, and left it there until two weeks ago.

When I started talking about cutting a new house out of plywood with the laser cutter, John quietly asked when I was going to finish his Foster's house.

Guys, I cannot stress enough that this man does everything for me and asks for very little in return (I say this as I'm making him assemble a monitor stand I designed and cut for him because I "did the heavy lifting, so the least he can do is put it together." Yes, I'm a hypocrite). So to say I felt bad is an understatement.

So I pulled it off the shelf, blew off the half inch of dust that had accumulated on it, and got to work.

I decided to paint some of the details into the rooms from the cartoon, to give it an extra bit of flair. John didn't want any furniture or decorations of any sort, because he was just going to be using it as a shelf. In fact, he kept telling me I didn't have to do all of the details I painted in if I didn't want to.

I'm not a painter, or an artist, so free-handing details is not in my comfort zone, so every time I thought it looked like crap I just told myself that it was adding to the "cartoon" feel.

I glued it together before painting the outside of the house, because I knew from painting the one I threw away, there were going to be some weird gaps that would be easier to address if it was assembled. I left off everything that wasn't part of the main house though, the window trim, porches, and chimney, and glued those on after everything was completely painted.

For the shingles, I found a sponge dauber in my stash, and just sponged on overlapping circles.

Then it was time to pick the colors for the outside again. I was legit scared. If it ended up looking like a hotdog stand again I was going to cry.

This time I used a screen capture to actually color match my paints. When the colors I had were looking a little too much like condiments, I picked a different tonal value of the same color out of my paints. Doing it that way, I ended up with a burgundy, some corals, and a vanilla.

Now of course it's not a dead ringer for Foster's, but neither was the chipboard house that John thought resembled it. I think the colors evoke a similar feel, and if you tell someone who's familiar with the cartoon what the inspiration was, they nod and say "Oh yea!"

I like the outside better than the inside (phooey on my hand painting skills), but John says he likes the inside best because it's colorful.

It's already on his desk, and his toys are happily roaming the rooms. There are also some dinosaurs living with the imaginary friends, and somehow a car got up on the roof. Personally, I'm just happy he's happy!

and that now I can start on my precious, my mid-century modern home...

P.S. While I have you here, I just want to remind you that this coming weekend is my turn to take over our YouTube channel. The last of my 2020 Roombox tutorial videos will be premiered on Saturday, and this one is the best of the bunch! If you haven't already, subscribe to our channel and click the bell to get notified when my video goes live!

*This post contains Amazon Affiliate links

Trash or Treasure?


Even though I’ve been doing the dot mandalas for almost a year now, I still get really nervous doing a new design. I don’t want to waste a tile and paint on something that could end up looking like a hot mess.

I really wanted to try one of the mandala stencils I had gotten in the dotting kit I purchased last year but was really struggling to visualize how it would turn out. I didn’t have a big enough canvas but I also wasn’t committed enough to put it on a tile.

I looked around my apartment and saw a cardboard box... cue wheels turning. Next thing I knew I was grabbing my scissors and cutting out a stencil size piece so I could give it a try without much risk.

After I painted two coats of black on my cardboard piece and let it dry I began making the marks that were cut out from the stencil. I cheated a little and added a circle with my compass so I had the perfect circle to follow.

Picking my colors was easy this time around since I didn’t feel the pressure I normally do and this was kind of a trial run. Honestly, at one point I looked at the marks before I painted them and was like “what the hell is this supposed to look like?”. Winging it became the name of the game the deeper into it I got.

Once I finished it and took a step back I ended up really liking this and even think it might be tile or canvas worthy. I even used a matte top coat sealer which felt kind of silly on a piece of cardboard but I felt it deserved “finishing”. At the end of the day I learned two valuable lessons:

1. At any given time you can look around your house and find art supplies in basic things, even trash.

2. Trying new things doesn’t automatically mean you’re going to fail.

So, try the scary, new thing and do it on something you might have considered trash, you may surprise yourself!

*This post contains Amazon Affiliate links

Celestial Moon Wall Hanging


Click here to purchase the kit to make this project!

Additional Supplies:


For my project, I was inspired by celestial themed wall hangings that I’ve been seeing all over social media lately. I got the idea to paint the wooden discs as little moons so that I could make a moon phase wall hanging. If you would rather paint your wall hanging with a different design, go for it! This kit is very versatile, so feel free to customize your piece’s design however you like!

To start, I cleaned and sanded all of my wood pieces. Rubbing alcohol works great to get the ash off of the laser cut disks!

Then I primed all of my wood pieces with enough layers of black paint to be opaque. If you want to go with a more colorful design, swap out your black paint and prime with white instead.

Now comes the hard part! Using a ruler, I mapped out where all of my hooks should go in my dowel. For my piece, I placed the top hooks (where the hanging chain will be anchored) an inch from each end of the dowel. I placed the bottom hooks (where the moon pieces will hang) at an inch and a half intervals all the way across the bottom, beginning and ending just shy of each end.

Next, I wedge the dowel between two heavy blocks and used a hand drill to drill holes where I want my hooks to go. If you have a nice clamp set up, that may work better than using heavy blocks like I did. Make sure to pick a drill bit that is just a smidge smaller than your screw. If the hole is too small you’ll struggle to get your screws in, but if it’s too large there will be nothing there to keep them in the hole. Also make sure your dowel is nice and secure while you’re doing this, or you will break your drill bit (RIP one of my nice diamond bits).

Once all of the holes were drilled, I started screwing in my hooks. This was the biggest pain of the entire project, but it doesn’t take any special skills, just determination.  I did the top hooks first, but in retrospect I should have started with the hooks on the bottom. I used a set of pliers to hold the hook while I gently twisted the dowel under it. It takes a little bit of pressure to get the screw to bite into the hole, but too much will cause the hook to go flying out of the pliers. Expect this not to go right the first, second, or third time, but as you go, you’ll get a feel for what amount of pressure and rotation works best.

Once all of my hooks were anchored, I gave myself a pat on the back, and you should too. The hard part is done! Now it was time for the fun part- painting! I started by base coating the fronts of 7 of my disks with silver paint. Remember to leave 2 completely black to serve as the new moons.I decided to leave the backs of my disks black, but if you want you can also paint the backs with other colors or use the same techniques as we are using on the front to make your disks double sided. Just make sure that you basecoat in a dark color before using metallics if you want them to look intense. For some reason the metallic flecks perform better over very dark colors rather than light ones. Metallic paint is usually on the sheer side, so it took a few coats to get it opaque.

Once that was dry, I started smudge painting my moon texture. I used an old brush to smudge on my texture, but you can use a cloth, a sponge, a paper towel, a brush with the bristles cut down- basically anything that will give you a nice irregular look. The important thing is to wipe off most of the paint on your brush/sponge/whatever before you start smudging. This keeps the paint from looking too opaque or building up texture.

I looked at a picture of the moon to try to put my smudges in places that looked close to the moon’s actual topography, but this isn’t really necessary. Just try to get all of your pieces looking in the ballpark of each other. It doesn’t have to be perfect (remember that most of them will get at least partially covered in black paint), but similar textures will sell the idea that they all are variations on the same moon. I started with a dark grey, let that dry, then followed it with a layer of white for highlights, and then smudged on a layer of silver to normalize the texture and bring down the harshest transitions.

Now that my moons had their texture, it was time to paint the black in! I started by organizing them. I picked my favorite disk to be the full moon, then my next favorites to be my crescent moons, and so on. This is the perfect time to cover up your imperfections and stinkers, so choose strategically.

If you want to map out your circles, find something that’s round and just a bit bigger than your disk and use a pencil to trace it onto the disk where you want your moon phases to fall. I am a jump in and fix it later sort of crafter, so I free handed my circles by choosing where I wanted my end points to fall and then working it backward, pulling my curves outward until they fell where I wanted them to go.

Once my circles were where I wanted them to be, I cleaned up all of the disk edges with black paint. I forgot this step while I was working, but once everything is dry, water down your matte Mod Podge (I use at least a 50/50 ratio, but more water won’t hurt) and use it to seal all of your painted pieces.

Next, I used a pair of good quality cutters to cut down my chain. If you want to follow my pattern, you’re going to want one 12 inch piece, and (in order of outside pieces to inside pieces) two 1 inch pieces, two 2.5 inch pieces,  two 1.5 inch pieces, two 3.25 inch pieces, and one 5 inch piece.

Then, using round nose pliers, I opened my jump rings and attached them to each side of each chain, and then looped those jump rings onto my hooks and disks until everything was hung.

Make sure to position your moons so that the black “new moon” pieces are on the outside, then arraying the pieces to follow the natural cycle of the moon all the way through the pattern. Once all the pieces were hung to my liking, I hung up the wall hanging and then lightly turned my hooks until all the moon pieces were facing forward while the hanging was, well, hanging. And then it was done! Make sure to take lots of pictures and show off your new art piece!

Click here to purchase the kit to make this project!
 

*This post contains Amazon Affiliate Links

Mini Mod Club Chair


Hello citizens of Sketchyville!

When I originally gave everyone the wood disks, I was thinking about painting mine to make a keychain of some sorts, but then I realized Neeley and Lexi would probably be painting their disks, and I like to be different. Plus, making miniatures is my jam right now, so that’s what we’re going to do!

We’re going to make these cool little 1:12 scale Mod Club chairs, and while my project is probably the most difficult out of all the kits, don’t be intimidated! I already made all of the stupid mistakes while making them, so you don’t have to!

I’m going to divide my tutorial into four separate chunks, organized by how I put my chairs together, but I’m also going to tell you when you can skip ahead, and when you might want to do things differently than I did. I’ll also let you know what steps are optional, so you can make chairs that you love.

Before we get started, you’re going to need some tools:

The kit will include everything else you need! We try to be helpful that way!

Click here to purchase the kit to make this project!

The Seat Back

We’re going to start with an optional step, but if you want curved seat backs, you need to do this step first!

Put a small pan of water on your stove, and bring it to a boil. Take two of the wood disks, and toss them into the boiling water. Leave them for 10 minutes.

Take one of them out of the water (using a pair of tongs) and allow it to cool to a point where you can touch it without burning yourself. One side of the plywood will be bubbled and lifting away from the wooden core. Go ahead and peel that off, the surface you expose will be the back of your chair. Now you’ll be able to see the grain of the core wood. Start gently bending the disk along the grain lines, curving it in towards the *good* wood (the surface you didn’t peel off). If the wood splits a little bit, it’s ok, but if it’s not bending easily and is cracking, try bending it in another direction, or placing it back in the water until it’s more pliable.

Once you have it bent into a shape you like, secure it to a container that’s the same diameter with rubber bands.

Do the same with the other disk, and then leave them until they’re completely dry, 24 hours or more. Feel free to work on the seat and/or the legs of your chairs while they dry.

If curving the seat backs intimidates you, that’s OK. Just skip this step and make flat backed chairs!

Once the curved disks have completely dried, you’re going to want to address the cracks that likely formed when you were shaping the plywood.

In your kit, there is a pot labeled *S* for “Spackle.” Take some of that, and smooth it into your cracks. You can use a brush, or a popsicle stick, but it’s also ok to use your fingers as an applicator!

Once you’ve filled all of the cracks with spackle, set them aside and let them dry again. It won’t take as long this time, an hour or two should do it. Then sand the spackle smooth with some sand paper.

Now you get to have some fun, and start decorating your chair! Black and gold paint are included in the kit, but you can use other colors if you like. I painted the back of the chairs black;

and stained the front of the seat back with a maple furniture marker.

If you don’t have furniture markers or stain laying around your house, you can use alcohol based markers (Copic or Sharpie) to stain your chairs, or even water based markers. If you use a water based marker though, be sure to seal it or it may bleed later on!

Congratulations, you have finished the seat back! Now that wasn’t so hard, was it?


The Seat

Take two of the disks, and the batting that’s included in your kit. Draw a circle around the disks onto the batting (a sharpie worked well for me), and cut out the circles. You can add more padding if you want squishier chairs, but I found one layer was enough for me.

Glue the batting onto the disks using the white glue included in your kit (Pot G), or FabriTac (shown).

Now you’re going to need some fabric. I used a faux velvet bag that a set of earbuds came in, because I like to upcycle things that would normally be thrown away. Projects like these are also a great way to get some use out of old clothing, but you can use whatever you like!

Cut a circle from your fabric a little larger than your disk.

This is where hot glue is going to come in handy if you have it. It can be done with white glue, but you’re going to be spending a lot of time holding fabric down waiting for it to dry. If you’re going to be crafting anyway, invest in a glue gun, you won’t be sorry!

Tack down the edge of the fabric on opposite sides of the disk.

Once the glue has taken hold, position one tack point at 12 (like it’s a clock) and then create a gather at 1 and tack it down.

Repeat at 2, and then flip the disk around, and do the same, working from the opposite tack point towards your previous gathers.

When you hit the quarter point, tack down the remaining fabric.

Now do the same thing on the other side

Whew, that was a lot, right? Trust me when I say it’s harder to explain, than it is to do! Dive on in, you’ll be fine!

Once your glue has set up, trim off any excess fabric without getting too close to the edge of the wood disk.

Repeat the process on the other cushion.

If upholstering seat cushions isn’t your thing, that’s OK! Just skip it and stain or paint two wooden disks for the seats instead!

The Legs

Before we start the legs, we need to talk a little bit about scale. 1:12 scale means that everything that’s one foot in real life is one inch in scale. I measured my kitchen chairs to see how far off the ground the seat sat, and they measured at 1.5 feet high so I aimed for 1.5 inches from floor to seat when I made my chairs. If you want bar chairs, you can make your legs longer if you like. You can also swap out the dowels that come in the kit for something thicker. Just make sure, if you’re making these for a project, that everything looks like it’s in scale with the pieces you already have!

Take the remaining two wood disks, and paint or stain them the same color of your seat back, and allow to dry.

While the disks are drying, take your dowels, and measure out how long you want your legs to be. I needed legs that were 1.25 inches long to achieve my desired seat height of 1.5 inches.

Then, cut your dowels down to size. The dowels that come with the kit can be cut with wire cutters, kitchen shears, or an EZ Cutter.

Once you have them cut to size, mark off where you want the taper to start, and make sure all the legs are marked evenly.

Sand the end of each leg into a tapered shape.

Paint or stain the legs the same color as your seat back, and allow to dry.

The pictures are going to get a little weird here, because I didn’t assemble my chair in the best order, and I regretted it later. Remember, I do stupid things so you don’t have to! So even though my pictures show a partially assembled chair, you haven’t missed a step, we’ll get to it!

On the bottom of the disks you painted earlier, mark off where you want your legs to be placed. You can eyeball the placement (I did), or measure equal distances for a more precise placement (recommended).

This next step is optional. I made indentations for my legs to fit into. I find it’s a little easier to glue them in this way, and it makes the chair a little more stable. You can skip this step all together if you don’t have the tools or just don’t want to do it!

If desired, used a Dremel or a hand drill to create an indentation in the disk where you’ve marked off your leg placement, being careful not to drill completely through the disk.

Once your legs are dry, glue them in place using the white glue.

I placed my legs at a slight angle, and checked the chair from all sides to make sure everything was evenly spaced before setting it aside and allowing it to dry.

Once your legs have dried, you can add wire to create a cross brace if you desire. Measure the inner distance between the legs at the height you would like the wire to sit; starting at one of the back legs, and working your way around the chair in one direction until you arrive at the leg you started at (sorry I accidentally deleted my pictures of this). Then, transfer those measurements to the piece of wire (a Sharpie works well here).

Bend the wire in a right angle at each of your marks. It may be helpful to bend the wire around one of the leftover pieces of dowel, to get consistent bends.

Glue the open ends of wire together. White glue will work for this, but super glue or hot glue will work much better!

If desired, paint the wire with the gold paint

You can also paint caps on the bottom of the legs to match the wire.

Once the paint on the wire has dried, slide it into place, and place a drop of glue on each intersection. Allow to dry.

YAY, you made it! We’re almost done now!

Assemble

You should now have three chair pieces for each chair, a seat back, a seat cushion, and a leg assembly.

Place a line of glue (white glue works, hot glue works better) on the back of the seat cushion (the side you don’t like), and attach the seat back to it.

Adjust the seat back so it sits at an angle you like, and allow to dry.

For the next step, if you don’t have hot glue you’re going to want clamps (binder clips, clothes pins) or you’re going to have to hold it together for quite a while. Glue the leg assembly onto the bottom of the chair, and squeeze the pieces together as hard as you can to flatten the fabric between the pieces.  If you’re using the white glue included in the kit, clamp the pieces together and allow to dry. If using hot glue, squeeze until the glue has taken hold.

That’s it! You’re done! You now have a mod club chair for your dollhouse that you made from scratch! Go have a cocktail, you deserve it!

Follow us on Facebook and/or subscribe to us on YouTube to be notified when we release the kits from our projects later this week! Once the kits have been released, we’ll update these posts with the full contents, and links so you can check them out!

Click here to purchase the kit to make this project!

I can’t wait to see what you make!

*This post contains Amazon Affiliate Links

Dot Art Keychain


*Note from Anne: This week we're introducing something new at Sketchyville! I've given all of the residents the same base craft supply, a handful of plywood disks, to use in a creation. Throughout the week, you'll see our creations with instructions here on the blog, and at the end of the week, with the premier of our latest video, kits will be released in the Sketchyville Gift Shop for you to purchase so you can make your favorite projects yourself!

Click here to purchase the kit to make this project!

For this project I’m going to jump right into the how to’s and steps I took to complete each keychain. I tried to do different styles, some easier than others so you’ve got some options to fit your comfort level. Before I did any dot work I painted my discs with two thin coats of black acrylic paint on each side letting it dry completely between each coat.


I made some step by step pictures so if you’re a visual learner like me it might be easier to follow along. Also, I must admit I got in a groove a few times and forgot to take pictures (sorry!).


1. Start by making a dot off center in the lower right quadrant of the disc.

2. With your second color, make four dots like you’re marking a compass.

3. Make another four dots, placing one each in the middle between your existing four dots.

4. Do this same thing one more time in the spaces you have left. You should end up with a complete circle and 16 dots total.

5. Changing the color and size of your dotting tool with every new circle. Repeat this 5 more times. Note: You will not have 16 dots for every circle as you get bigger.

6. Once you’re to the final circle, using the same color, or different if that’s what you prefer, make three dots that gradually get smaller towards the edge.

7. You can go in after the dots are dry and add a second layer of dots for a little dimension but this is completely optional.


1. Place three larger dots near the edges in both of the top quadrants and the lower left quadrant.

2. Start with marking your compass points around each center dot, then placing a dot in between each of the original four. You won’t have a specific number for each set since you’re going off the edge of the disc.

3. Moving onto the next dot circle and using a larger dotter/different color than the previous dot circle do the same thing but place your dots in between but above the already completed circle.


4. Repeat step 3 again changing the color and using a larger dotter than the last.


I personally did step 3 one more time for two of the mandalas and on the other added a dot gradient to the edge. This is a good opportunity for you to freestyle a little bit and experiment. As you can see I also mixed up the sequence of colors but you can keep them in the same order if you choose!


This is one of the harder of the four mandalas because I’m introducing “crowns”. Once you get the hang of the crowns they go super quick and add a little flare.


1. I used a pencil and ruler to map out four equal quadrants and guidelines to make things a little easier. I used the key ring hole at the top to help me find the center. I also measured at the widest part of the disc to make my horizontal guideline.


1. As always add your center dot, then proceed with adding your first compass points (orange).

2. Then add your second set of compass points (yellow). It’s going to look square ish when you’re done.

3. Place the third set of compass points (green) on top of the first four dots you placed.

4. For the crown, take a smaller dotting tool and add a dot at the top center above your #2(yellow) and #3(green) compass points. You’ll then work your way down both sides, getting smaller with each dot you place.


6. Continue adding another crown on to your #3 (green) compass points.

7. For finishing touches add one dot on top of the double crown to fill in some space

8. Then add a dot gradient stemming from the single crown to the edge of the disc.

9. Again, if you want you can add a second layer of dots for more detail once your first layer is dry.


This was the first time I had attempted this last design so keep your fingers crossed I can explain it properly. You will need exactly 4 colors for this design otherwise the swirl look will not work.


2. Just like the last one I drew my guidelines for four quadrants before placing my center dot.

3. On line A place two dots on both sides of your center dot. Do this on side B as well but with a different color.

4. You’ll do this two more times on line c and line d, using different colors again.


Don’t rush this next part, it’s where things can get tricky.


4. Moving clockwise we are going to place individual dots for each color in between two dots from the first circle. If your rotate the disc as you work, the color of dot you need to do is always on the right side below.


5. Continue doing this and increasing your dot size with every complete pass around that you do. Don’t forget to clean your dotting tool off between each color. That’s why this one is so tedious and time consuming. You’re going to run out of room so don’t worry if you have dots going off of the edge.


Once the discs are dry you can use an acrylic finishing spray or triple thick to not only protect them but make them nice and shiny. Be sure to cover both sides of your keychain, especially if you choose to paint the designs on both sides! Then you’re set to put on the metal pieces and add it to your keys!


If this is something that peaked your interest, keep an eye on Sketchyville’s store for this kit coming soon!

*This post contains Amazon Affiliate links

< 1 2 3 4 5 6 >