Blog

I Should Not Be Allowed Near Children's Toys


Due to growing up in a house with 6 other people, including one who is a decade younger than me, I got used to a lot of noise. It was hard to find quiet moments, so eventually I became good at working with noise. In fact, noise became necessary for me when I work. The quiet is actually a distraction for me. When I moved into a (relatively) quiet dorm for college, I often found myself struggling to make a good atmosphere to study in. Eventually I started blasting music with headphones, or I would sit with friends in the public areas of the school so I could get my work done. It’s the same when I’m making things. If I need to zone out into a project I’ll blast music, but more often I play YouTube videos while I work to keep my mind engaged as my hands are moving. Lately, I’ve been enjoying watching art videos, the more chaotic the better. That is how I recently found myself watching a very fun channel named Chloe Rose Art. One of her longest running series involves her testing art hacks from various places on the internet. Usually I enjoy watching hack test videos just to watch the tester struggle, but one of the hacks she tried stood out to me in particular.


Hack starts at the 4.00 minute mark

In the hack, the artist is supposed to spear a piece of paper on a drill bit, then turn on the drill, all while the drill is dangerously facing up toward the artist. Then, the artist uses a pen to draw on the piece of paper, leaving these cool punk looking spirals. Obviously the hack had issues. Spearing a piece of paper leaves a big raggedy hole in the middle of the piece when it’s removed from the drill, and there were obviously dangerous elements about using a drill face up, let alone in putting your hand so close to a spinning drill bit. But still, something about that cool spiral taunted me. I wanted it. I wanted to use it for backgrounds of paintings. I wanted to play with it. I thought about it, and decided a flat spinning surface would work better (especially for canvases) and be safer overall (questionable in practice). Before I knew it, I was browsing Amazon for photography turntables.

I found myself disappointed. Most of the turntables were more than I wanted to pay to try my silly idea, and they all spun so slowly that it didn’t feel like they would work. Disappointed, I tabled the whole idea.

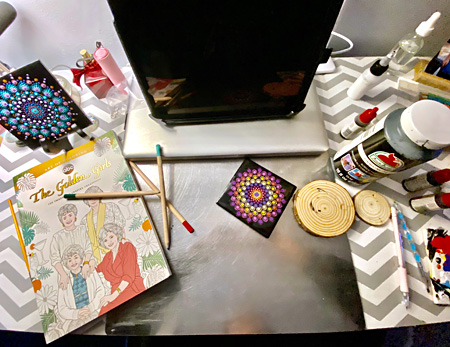
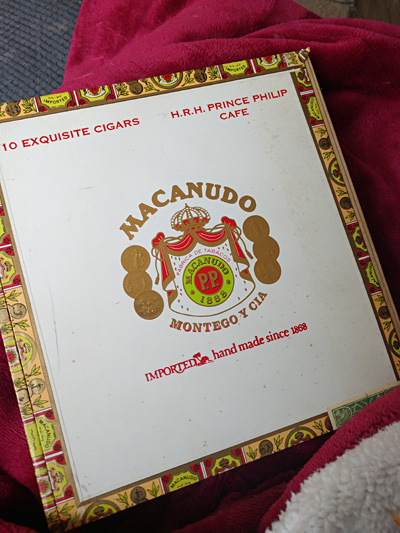
Then, a week later, I found myself scrolling through Five Below’s website, looking for nothing in particular. I love Five Below, and I use it a lot to find silly things to paint or craft with. It’s the closest thing to an online dollar store that I’ve found since I’ve moved most of my shopping online to avoid the pestilence that has come over the land, and I have an unhealthy love for the dollar store. While I was browsing, I saw it in all of its $5 glory: A children’s pottery wheel.

Here was the solution for all my problems! It moved faster than the piddly turntables, AND it had two speeds. It had a flat surface, and it was FIVE DOLLARS. And it came with free clay and shitty paint. I put it into my cart so fast, and a week later, it was mine. When it arrived, I gleefully went to show it to Anne and tell her my plans. She was less confident.

“That’s going to make a mess”
“Nahhhhh it’ll be fine.”
“You’re going to get paint everywhere”
“I doubt it.”
“Put it in a big box when you use it to be sure.”
“Fiiiiiiine.”

I waited until she was out of the room to try it out.

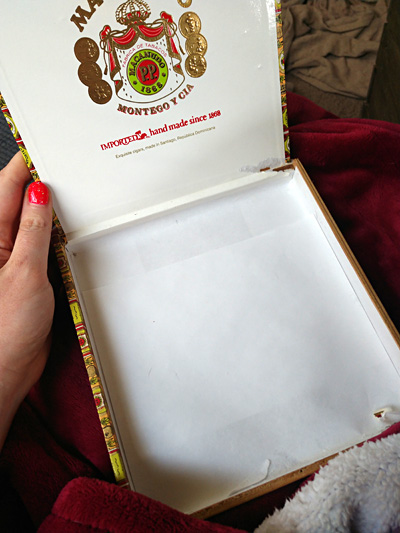
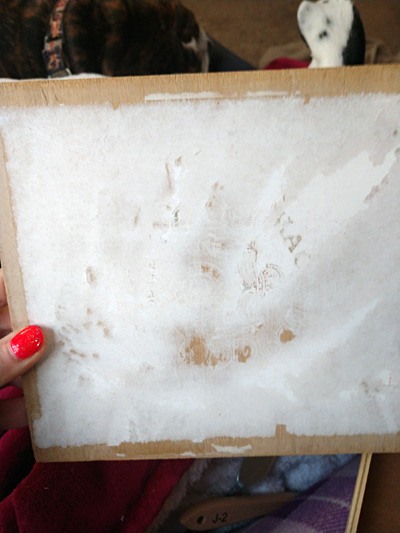
To be completely honest, I did make a nice little paint proof set up for my spinner. First I spread one of the dog’s blankets on the floor. Then, to avoid having to see the face the dog would make if I took away one of her five blankets, I covered the blankets in some old packing material from the shipment the wheel came in.
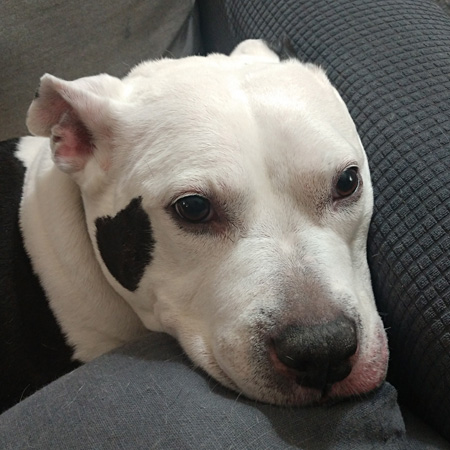
 

Not spoiled at all

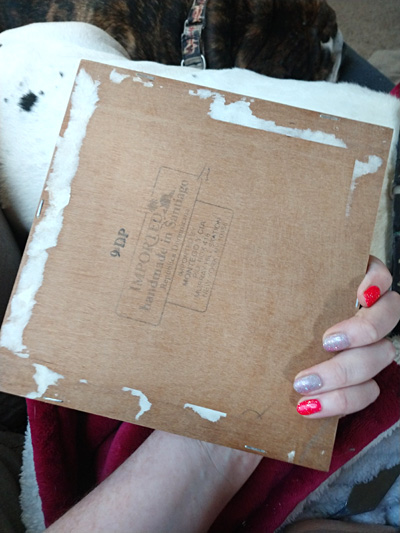
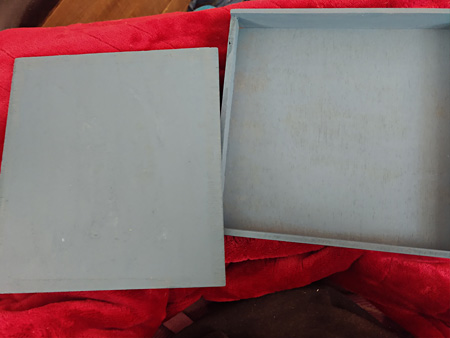
Then I set up the box as a backsplash, and threw a few other boxes around me to be thorough. It looked ridiculous, but I figured it would work well enough. I bluetacked the canvas onto a dollar store book box we had lying around to elevate it away from the surface of the wheel, and then bluetacked the whole thing on the wheel. My MacGyver style contraption was complete. All that was left was to turn the whole thing on.


You can just smell the professionalism

With a shuddering demonic whine the pottery wheel spun to life.


It clearly was struggling with the weight of the 11x14 canvas, and refused to spin until I turned the speed up to the second setting. The thing is, the speed setting it located on the bottom of the wheel, and the canvas overhung the wheel by quite a bit, so when I hit the speed slider and increased the speed, the canvas thudded right into my wrist. Luckily the power was low enough that the canvas stopped upon hitting me, and only hit me with the force of a strong tap, but if the motor had had more power, it might have been a different story. I moved my wrist out of the way and the machine started spinning, whipping my canvas around in a way that seemed to put it in danger of flying off at any moment.

I was fucking delighted.

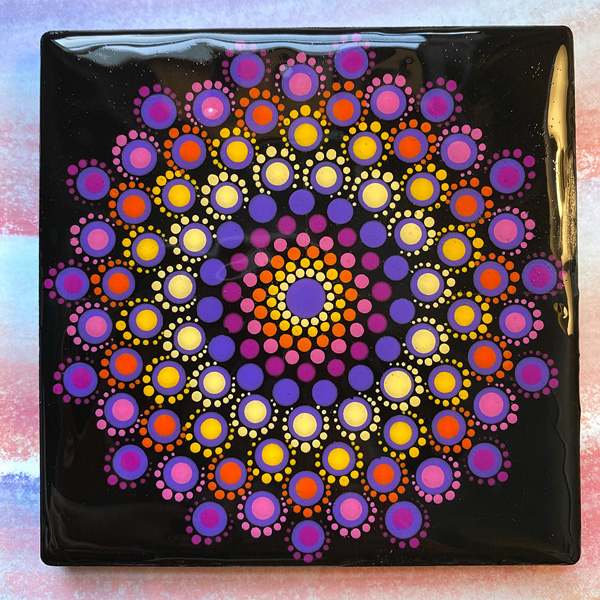
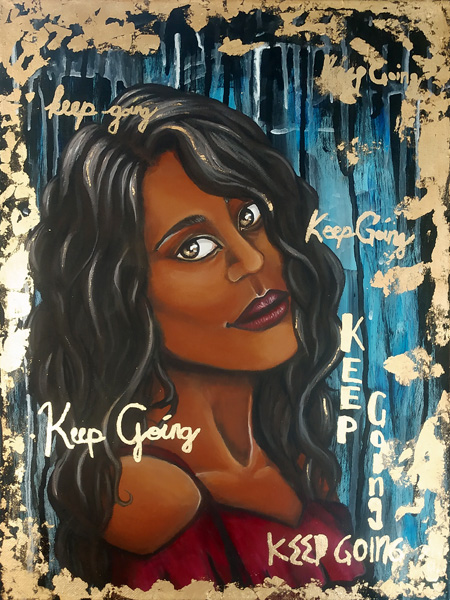
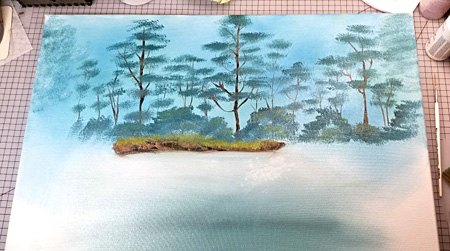
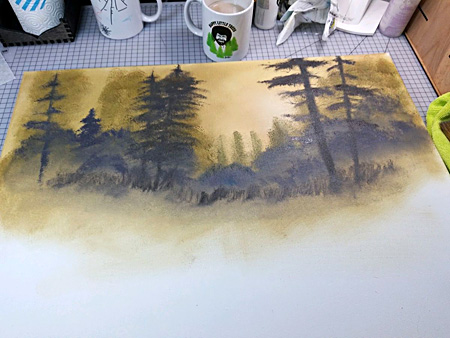
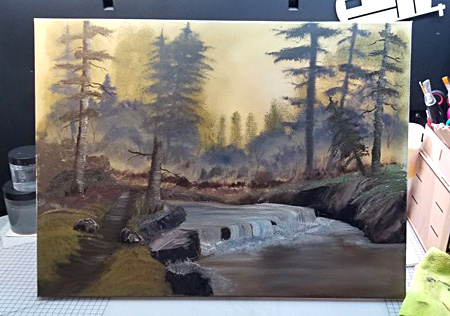
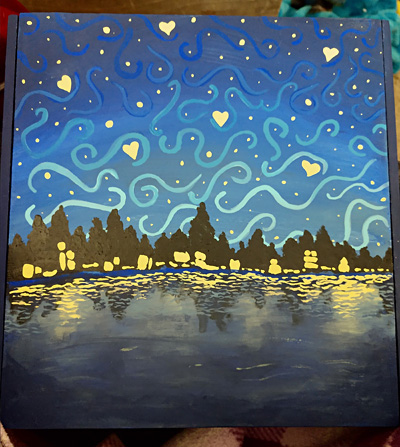
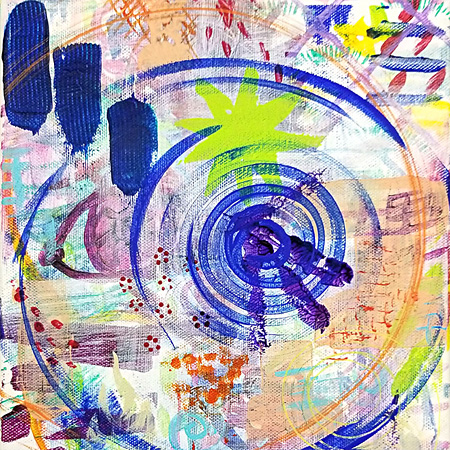
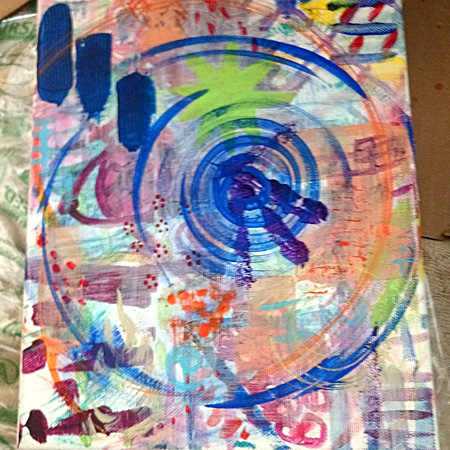
Okay, the pottery wheel obviously has issues. The surface is a little low on the machine, requiring me to use haphazard setups to get my hollow backed canvases to attach to it. And realistically, while it was more safe than using an upright drill, my setup still had some obvious safety issues. My redemption lied in how cheaply made the wheel was, causing it to lack the power necessary to do horrific amounts of damage. But it WORKED. I experimented with different paints and brushes on some of my randomly prepared canvases to see what kind of swirls I could get, my favorites where the small flat brush and the big poofy makeup brush, two very opposite brushes that both gave me the cool chaotic yet controlled kind of feel I was looking for.


And the best part? Not a single drop of paint went flying.

At least, not at first.

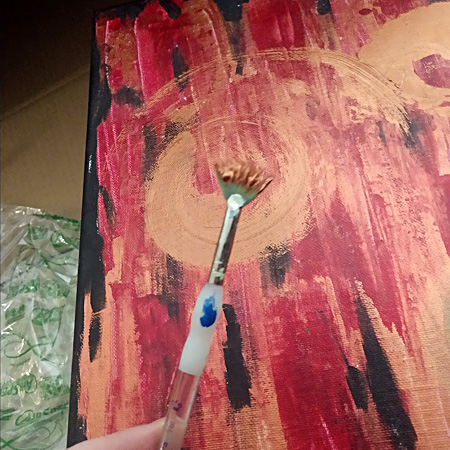
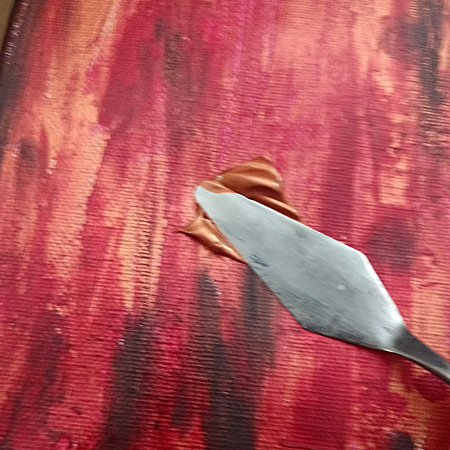
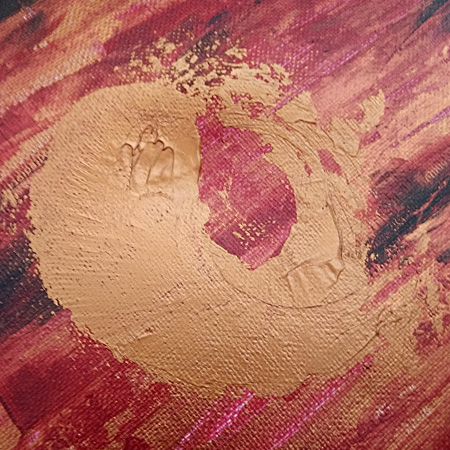
In my tests that involved me using the wheel as I had planned to, the paint remained on the canvas. Even the big globs of paint that I put down so that I could smear them around with a palette knife at speed stayed nice and neat.


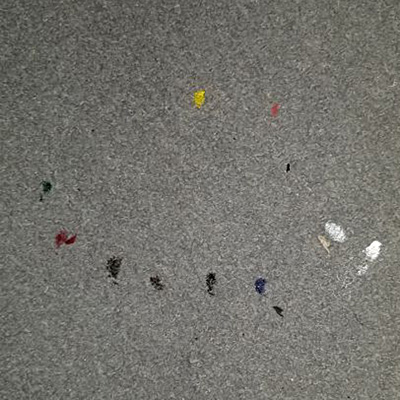
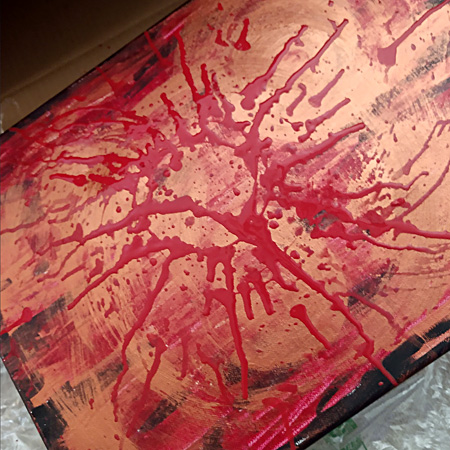
So, knowing that the paint was staying put, I decided to do some tests to see how wet the paint had to be to splatter off. I grabbed some craft paint, added water, then splatted it down on the canvas with a big brush. This did make a mess, but from what I could tell, the paint wasn’t spattering off with the rotations, it was just spattering all over as I shook the brush. And when I stopped the wheel (with another whack at my wrist) the result was a cool circular splatter that spread out toward the edges of the canvas.


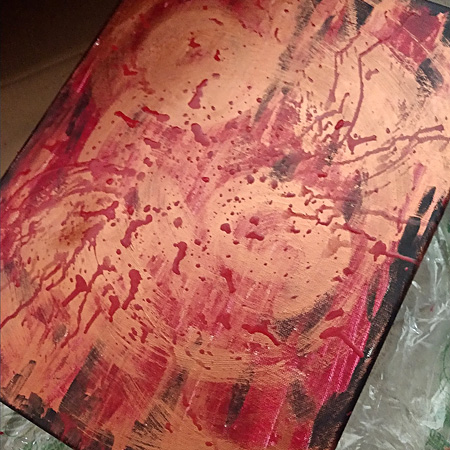
 So I turned the wheel back on and poured the watery paint that I had left. Still, barely a splash, though some drops did manage to find their way over the edge of the canvas.


I think I’m perfectly justified in saying “Nyeh Nyeh” to Anne now.

*Note from Anne: She is not! If I hadn’t said something, my living room would look like a crime scene right about now!!!!

So, would I recommend doing what I did and buying a kid’s pottery wheel to strap canvases to it? Not unless you’re a fan of rotary bludgeoning weapons. That said, I had fun, and I’m totally going to keep using this. With some modifications. What I do recommend is looking at items and materials in new ways. You never know when you’ll be able to solve a problem you never even knew you had, and the joy in art comes from making something completely new. Try something new, use things in ways they’re not meant to be used (though please make sure you do it safely), and play around!


Short Attention Span


I have a short attention span.

That, and the fact that the eye roll emoji is always at the top of my most used list, is pretty much all you need to know about me.

Ok, maybe not all you need to know, but it’s certainly in the top five.

Because of this, I’m really good at starting projects, and not so great at finishing them. I tend to stick to crafts that can be completed in a short period of time, because if I have to stick with it for longer than a week, it’s probably going to end up in Lexi’s proverbial “Drawer of Shame,” except it will never again re-emerge. In my reality, the drawer of shame is where crafts go to die.

Taking up dollhouse miniatures as a hobby has given me a little bit of both worlds. Where completing a dollhouse can take a long time, the items that go into the completion are extremely varied, and each can be finished in just a few days (for the most part).

The problem is that I’m really good at starting projects, and there are just so many different things that sound like so much fun to create! Oh, a book box showcasing a scene from your favorite novel? Sign me up! A diorama to process the trauma of 2020? Everyone needs one of those! A quarter scale witch house for your kid to display their hand painted miniatures? A must have item! Don’t forget the haunted dollhouse that started it all, and the half scale Pose Skellies that need a home, the Disney’s Haunted Mansion globe for your friend, the tchotchke house for your husband, the retro camper kit, and so on, and so on…

You get the idea.

I currently have four active projects going (it was five but I recently completed the 2020 diorama and I haven’t replaced it yet), and ideas for a million more. The main issue is a space thing. I only have room to store what fits on the top of my craft shelf, and it’s currently full. In fact, it’s over flowing because my book box project doesn’t fit and has taken up residence on my computer cart (in the original plan it wasn’t as large as it has become).

But that’s OK. Everything is normal here, it’s all perfectly FINE!

Until I was feeling crappy this last weekend, and went to Etsy for some retail therapy.  

Wait, what is that new upload in the laser cut files section? Why, it’s my kryptonite, thank you for asking. Behold the beauty of the mid-century modern dollhouse calling my name.


Not my pic, or my dog

“Anne,” it sings, “I’m conveniently scale-able for inch scale or half scale. Your Pose Skelly family could live in me quite comfortably.”

I side-eye John to see if he’s noticed my mouse cursor hovering over the buy now button. He has, and he wants to know where I’m going to put it.  

He points out that I could clear up some space by finishing the project I started for him last May. The one that only needs to be painted and glued together to be completed.  The one that would surely take less than a week to finish, and would confirm my appreciation and undying love for him and all he does for me.

OK, ok, he didn’t actually say ALL of those things, but it was implied!

I pulled the house off the shelf (right after I purchased the Etsy cut file), and blew about a half an inch of dust off of its roof. It won’t take me long to finish it, and John is excited about having his own Foster’s Home for Imaginary Friends house to display his tchotchkes in.

I’m just gonna have to bang this out real quick so I can get to work on my precious, my mid-century modern precious…

Since I have a short attention span.

*This post contains Amazon Affiliate Links

The Creative Blues


Alright guys, I’m going to just preface this with, if you’re here to learn about some new and fun art today, this blog post is probably going to disappoint you. 


For many of us, the last year has been rough to say the least, am I right? Well, for me personally, and I know Anne and Lexi can relate, this year has been exceptionally hard. Anxiety and depression are no joke under normal circumstances but throw in a pandemic and you’ve got a recipe for some tough stuff. 


I won’t lie to you, this is probably the hardest thing I’ve ever gone through. I have had ZERO motivation this week because some days it’s just easier to exist than try to accomplish things. As I tried to find inspiration to do art to share with you all, I was really struggling and the more I tried, the messier my desk got. I kept bouncing from thing to thing and felt this pressure to produce something of high quality and I just couldn’t. 


Last weekend Anne and John brought me a few things to cheer me up since I was having a particularly rough day. One of those things was a Golden Girls coloring book. If you know me at all you know one of the few things that always makes me smile is anything Golden Girls. I tried working on a page from it and even that felt like too much. 


After that I tried to finish a coaster I started months ago, but again it just wasn’t going the way I wanted. The UV resin was being difficult and curing from the light of my window and getting gummed up preventing me from having the perfect look I desired. I almost threw my hands up in defeat put powered through because I had worked so hard on the actual dot work of the coaster. 


The truth is, even though I powered through and finished the coaster, I was feeling that defeat. After talking to Anne about how I was feeling she reminded me that Sketchyville isn’t about being perfect. We started it because we were using art to cope and prevent ourselves from going crazy during the pandemic. I needed to hear that I was not a failure for being human even if I couldn’t find my creative groove this week. So, instead of trying to do some art my heart wasn’t 100% in, I wanted to remind you it’s ok to have bad days and don’t forget to be kind to yourself. 


Why the "Drawer of Shame" isn't Shameful


Do you keep a drawer for works in progress? I do. It’s like the Island of Misfit Toys in there. Any time I start a project but don’t finish it for whatever reason, it goes into the drawer so I can work on it later. Sometimes much, much later. Some just need one more piece painted, and some have nothing more done than the basecoat. The problem is that I’m great about starting projects with a lot of enthusiasm, but I’m not always great about finishing them. At least, not in a timely manner. 


This isn’t even everything in the drawer

While the drawer is mostly for minis, I have other projects scattered all over. Paintings, repaints, projects that are just a few steps away from completion- There are so many.

A lot of people see unfinished projects as a negative thing. I don’t anymore. Yes, it can be stressful to be surrounded by reminders of what I haven’t finished, but I also know that eventually a mood will strike me, and I’ll spend a week just powering through pieces that had been forgotten. And, when I just want to get something done, I have all of these projects ready to go! 


A newly finished painting from the drawer of shame

This week has been a week like that. I’ve been in the mood to finish things, so I’ve been powering through old paintings and minis. I’m even working on a bust that’s been sitting in the WIP drawer for a year! In this week alone I’ve finished two paintings, gotten a great deal of work done on the year old bust, and made a lot of progress on a few other projects too. 

If you catch yourself feeling bad about your own unfinished projects, remember this pile. And yes, it is a pile. It will be years before all of these projects are done, and by that time I will have made more unfinished projects to replace them. But, when I come back to these projects, I will be glad for the work I’ve already done. Staring at a white canvas is really intimidating for a lot of artists, so having this pile means that I have options to avoid that. I can be confident setting aside a project that I’m not feeling or that isn’t working because I know that when I return to it I will have the motivation and improved skills that I didn’t have when I set the project aside. 

Keep a works in progress drawer. Move on when a project starts to feel impossible to finish. Return to it when you want to. Burnout is a bitch, and creating should feel fun. Just keep making things. 

The Bob Ross Paradigm


I have a love/hate relationship with Bob Ross at the moment. I love him, but we're not currently on speaking terms.

Let me start from the beginning...

My husband (John) and I have been watching the Bob Ross channel on Pluto before we go to bed every night for the last few months. The Joy of Painting is a really good show to relax to before bed. Bob has a wonderfully soothing voice, and watching him paint is a bit like magic. He also has these great Bob-isms that make you feel good about life. Accidents are happy, and trees have friends in Bob's world. It's a nice place to live for an hour or so each day, especially when you compare and contrast it to our current reality.

The problem is that in Bob's world, everyone can paint like he can. He tells you over and over that anyone can do it, that he has no special talent. So when a creative person, like myself, who has no particular artistic talent but is relatively crafty, watches the show regularly, they start to believe him.

I got the idea that I wanted to make a Bob Ross painting in miniature for my haunted dollhouse. Except I haven't painted anything artistically since a pretty brutal art teacher in middle school told me I might be better off if I just stopped trying. Also, I've never touched oil paints, and none of the creatives in my house owned any. Additionally, as if those other things weren't enough to discourage me, I didn't have any proper brushes for the technique.

I'm not one to let any of those things stand in my way though, oh no no no!

So I did it, and I'm not going to go into too much detail because I recorded it (and my colorful language while completing it) for the YouTube channel for a future video. It turned out mostly OK though.

It's a tiny 1.5 inches by 2 inches, and I didn't expect it to look like a masterpiece, so I don't hate it. It will look just fine hanging in the living room of my dollhouse.

So here's where I might have gotten cocky. I said that it probably would have been better if I had the right paints, brushes, and was working in a proper size. I swear to you, I wasn't trying to make excuses, I honestly believed it when I said it.

Well, my dear and loving husband, who enjoys enabling me, purchased a Bob Ross painting kit for me as an anniversary gift, and gave it to me last weekend. So of course I also had to have a proper Bob Ross sized canvas, which measures in at 18x24 inches.


It's huge! It takes up my entire craft desk!

I spent some time browsing the Bob Ross YouTube channel, deciding which of his paintings I wanted to try for my first attempt. I didn't want anything too advanced, and in the end decided on this one:


It didn't take me long to realize I was in WAY over my head.

Now I know you're looking at that photo and thinking "Anne, you're too hard on yourself, that doesn't look too bad!" Trust me when I tell you that the picture doesn't do it justice. It may not look too bad, but it really doesn't look too good either. John, who is unfailingly supportive of all of my dumb ideas and has an endless supply of encouragement, tried to console me when I wailed that it looked like a middle school art project by saying it wasn't that bad; it was at least a High School level attempt.

I love that man!

I was going to keep going and see if it got better, but I had the bright idea that I could fix the tree trunks, which were the part of the painting that was really bothering me. It turns out that was a horrible idea, I turned the trees into blurry blobs, and I ended up scraping the paint off and cleaning the canvas.

I'm not so easily defeated though, so I decided I would try to paint the same painting I had already completed for the dollhouse. I was familiar with the techniques Bob used in the video, and already had some experience with it. I would just be making it much, much larger this time. So I dove in again, and it seemed to be going a lot better than my first attempt.


For the most part...

Did you know that oil paint doesn't come out of carpeting? It's a small consolation that the carpet in my office is nearly 17 years old, and the dogs have pretty much already ruined it. I'm debating turning it into an art installation, since it's just an inverted impression of my palette. I could totally draw a palette shape around it...

Dropping my palette made me feel a touch cursed, but I soldiered on.

I was starting to think it might have been easier to paint in miniature with the wrong paints and the wrong brushes, I could not get my fan brush to work like Bob's despite literally using the same brush he used. Also, why did my colors keep turning into mud, while his stay separate and beautiful?

John thought it might be that I needed to practice the technique. I argued that it must be a conspiracy, because Bob told me ANYONE could do it, and I am absolutely anyone, one might even say that I'm a someone. So why was this so fragging difficult?!?!

I pushed through, and three hours later (Bob painted it in 30 minutes) I completed my first large scale landscape painting.

I don't hate it, but I don't love it either. It feels exactly like what it is: A first attempt at an activity that's going to take me some time to become proficient at. I won't be hanging it in my living room. I might even paint over the canvas so I can try again. I have the pictures I took if I want to be able to compare and contrast it against my future attempts.

Here's the thing, I've been crafting a long time. I've built up a lot of different skill sets over the years, which usually give me some sort of knowledge base to draw from when I try something new. It's not often that I come up against a new art/craft I want to do, that I don't feel somewhat decent at right out of the gate. Bob made me believe I could paint a beautiful landscape, but I can't, at least not yet. For that, I'm a little mad at him right now, but I still love him and eventually I'll get over it.

The interesting part of all of this, came as a realization later that night. John and I were in bed, watching The Joy of Painting as usual only this time I was swearing under my breath at Bob while he painted his happy damn trees, and John asked if I at least had fun, because he would be sad if his anniversary gift had made me upset.

As I thought back over the hours I had spent trying to paint like Bob Ross, I realized that everything outside of that effort had melted away. I had lost all track of time, I even texted Neeley hours after her normal bedtime, not realizing how late it was. Something I would normally NEVER do. I hadn't thought about Covid or politics, I didn't think about how much I miss my dad or my dog, I didn't go into an endless anxiety loop about how someday John or I would be widowed, or wonder if the pain in my lower back is a symptom of cancer.

I just thought about painting.

Having to step completely out of my comfort zone and my knowledge base, made me focus entirely on how my brush was moving, how my colors were mixing, and I didn't have room in my head for anything else, not even the obtrusive thoughts that my disorder constantly throws at me. It was hours of blissful relief, even if my finished painting didn't bring me an immediate sense of accomplishment.

In Sketchyville, where we're crafting as a form of therapy, it's important to remember that it's not the end product that matters. Trying new things is scary; being bad at new things is even scarier when your brain is telling you that only perfection counts. The goal isn't the results though, it's doing something that makes you feel good, even if what you make isn't all that great.

That's why we're living here in Sketchyville, to show you that you can do this too. We're not experts, we fail. Sometimes we fail spectacularly. We're here to show you the bad and the good, because we want you to know that failure doesn't matter. The important part is the process and doing something that makes you feel better. They never showed Bob failing, but they should have. He did a lot of preparation before filming to make his efforts look casual, but they weren't. It's time to shift the Bob Ross paradigm of perfection into practice.

I think Bob might have enjoyed a nice vacation here in Sketchyville. Freedom from perfection sure is good for your mental health.

*This post contains Amazon Affiliate links

Be Notorious


A few months ago we lost a hero, not only to me personally but so many others. The Notorious RBG. Ruth Bader Ginsburg was a true icon and powerhouse of a woman. She inspired and gave me hope for a better future for everyone and especially myself. Ruth didn’t know me personally, but I hold her fondly in my heart so when she passed away I knew I needed to do something to honor her in my own way. 

I sat and watched her funeral on television while I made this, shedding tears throughout. This particular collar of RBG’s I used for inspiration was her “dissent” collar. She would wear specific ones for different occasions in the court, and this collar was her way of going against the majority and standing her ground. Often times she stood up and used her platform to fight for people who didn’t have a particularly loud voice. 

I actually used one of B-Movie Beauty’s Slather It Body Butter jars to create the half circle guides for the start of the collar. Sometimes you just gotta grab what you have nearby and roll with it! After that I used a ruler to draw guidelines that varied in length for the vertical parts. After that I looked at reference pictures of the collar and just kind of winged it making sure both sides matched. 

I added the lettering at the bottom with pencil first, then went over with acrylic paint. As I’ve said in other posts, lettering is not my jam. I went on a font generator website, found one I liked and tried to copy it free hand. Thankfully I didn’t butcher it too much. I topped it off with a gloss finish acrylic spray and voila, it was complete. 

This piece was made purely to bring comfort to myself, with no other intention than to show my appreciation for her. I loved making this because I didn’t have a plan when I started, I just dove in and in the end I found that to be very cathartic. It was also a great reminder that I could use my skills I’ve developed in making the mandalas to create something else! 

A Very Valentine's Upcycle


My relationship with Valentine’s Day is very impersonal.  It’s not like I hate it or anything, but it’s never been my favorite holiday either.  I haven’t been in a relationship for a very long time, but even when I was, none of my partners were hugely gung ho on the holiday, so not much happened. I love Christmas, and I go all out for Halloween, but for me, Valentine’s Day is my mom and John’s anniversary and not much else aside from the opportunity for cheap day-after-Valentine’s clearance candy. 

In spite of all that, I do have one treasured Valentine’s Day tradition. I scour the internet looking for the cheesiest, creepiest, most poorly made oddly sexual valentines, and then I message them to my friends. It started when my former roommate and I were both single for Valentine’s Day, so we spent the day spamming each other with these odd creations that we found. It’s a tradition that makes me smile because it’s rooted in love, as well as a strange sense of humor. 

Valentine’s Day doesn’t have to be about romantic love. It can be about platonic love or family love. It can even be about the love we have for our pets. So, when Neeley and Anne suggested that we all do Valentine’s Day themed posts this week, even though I was at a loss as to what I should make, I decided to make something for a good friend of mine. She was one of the people along on the trip that inspired my embroidery project last week, so I decided to make a box to go coordinating box inspired by the painting that project was based on (Van Gogh’s Starry Night Over the Rhone) and a photograph my friend Erik Czech-Swanson took of the view across the lake. 

After a quick dig through my basement (which is a magical land, full of many forgotten craft supplies), I found an old cigar box that was just waiting for a makeover. Suddenly, I knew what I wanted to make. 

The cigar box was covered in paper labeling, so I started by trying to rip all the paper off. Unfortunately, the labels were glued on more securely than they seemed, so I had to try to alternate between tearing up loose pieces and sanding off the pieces that were securely glued down. I wasn’t able to get all the paper off, but eventually I decided it was good enough to move on. 

Next I primed the entire box with Oceanic Blue Stynylrez. It’s very important to put a base layer down when you’re painting on wood because it prevents the paint from absorbing into the wood and bleeding, which can ruin the look of your design. That base layer doesn’t have to be a primer though, since the wood texture grips paint well. Any opaque acrylic paint will do the trick. 

Once my box was primed, I got to painting. I decided to emulate Van Gogh’s impressionistic style, but I also wanted to make it my own. I didn’t really have a plan for this design, so I just followed my gut and painted what I thought might be pretty. Impressionism isn’t something I do a lot (and neither are landscapes), but I’m really happy with how it turned out! Maybe I’ll have to do more of these!  Next, to seal and protect my paint job, I lightly covered the entire box with a coat of watered down Matte Modge Podge, my go to sealer for wood projects.  

Finally, my box was almost done. All I had left to do was to install the hinges. See, the cigar box relied on its paper label to serve as a hinge and attachment point for the lid. So by removing the paper, I knew I needed to replace it with legitimate hinges. Luckily, Anne had some teeny hinges and nails that she’d bought for our 2020 Dumpster Fire Ornaments. I figured installing them would be a snap!

I was so very wrong. 

The problem with tiny nails is that they are impossible to hold with your fingers. I couldn’t just hold it like I would a traditional nail. To combat this, I grabbed a pair of tweezers, which I had to hold in my left hand (and I will have it added to the record that I’m definitely NOT ambidextrous) while I delicately tried to bash at the nail with a teeny hammer in my right hand. Even with this high tech operation in full swing, my nails weren’t going into the wood well past a certain point due to my fear of accidentally busting the box instead of the nail, and my hinges kept trying to slip out from under them, despite the many layers of glue I’d laid down to secure them in place.

After a nice long rant about how tiny nails were the actual devil (which included a great deal of biblical imagery and swear words), I asked Anne for suggestions. She came up with a system that involved using a popsicle stick over the nail to protect the box from wild swings. After another small struggle, I was finally able to get the hinges in, and my box was done and ready to go to its new home.

I hope you all have a happy Valentine’s Day. Remember that in the end, it’s about love, and there are so many kinds of love in this world that are all worth celebrating. Unless you love tiny nails. Fuck tiny nails. 


*This post contains Amazon Affiliate links

Love Medicine

Valentine's day isn't just a Hallmark holiday at my house, it's also my wedding anniversary. My twentieth anniversary this year, to be exact.

I'm not really a sappy, romantic kind of person, so people are often surprised to learn this cheesy fact about me. We really only did it for one reason though.

I'm terrible at remembering dates.

People often think I'm covering for my husband when I say that, but numbers stick in his head like glue. I, on the other hand, still have to ask my third child when her birthday is, because there was a debate when I was pregnant over which day we were going to schedule the c-section for, and now the two dates are forever confused in my head. I'm a terrible human when it comes to these things, so I try to give myself a little help whenever I can.

Having an anniversary on Valentine's day kinda sucks when you're an introvert though. Everywhere you go is over crowded and has long wait times. So we typically don't do much for our anniversary, but for our twentieth, I always imagined we'd do something.

Alas, we're still locked down at our house. My husband is high risk for covid, and we're not doing anything unnecessary until he can get a vaccine. So I was stuck trying to figure out what to do for a milestone anniversary in the middle of a pandemic.

I'm not romantic, but my husband is, and the gifts he's always appreciated the most from me, are the ones where I stepped outside of my comfort zone and did something romantic and thoughtful for him. For a big anniversary, where we can't leave the house, the least I could do is something like that for him, right?

Which brings me to our project today. I decided to make him messages in a bottle, of sorts.

I found extra large empty pill capsules on Amazon. The flat side of each capsule measured about two centimeters, so I cut a few sheets of printer paper into strips that size.

On each strip I wrote a note. Some were funny, some were romantic, and some had doodles, but each one was unique in some way. I thought about printing them out, which would have been quicker, and much easier on my arthritic hands, but I recently learned how much it means to have a hand written note from someone you love after they're gone. So I bit the bullet and wrote them all by hand.

Then, I used a toothpick to help me roll up each strip of paper into a tiny scroll, before popping it into one of the capsules.

I had originally planned to make 100 notes, but I realized that was unrealistic for my creative and romantic abilities. Instead, I made forty notes. One for each year we've been married, and one for at least twenty more years that I hope we get to spend together.

I used my Cricut to make a decal for an upcycled gum container to keep them in. If I had found an empty prescription bottle in the house, I would have used that and put a witty "prescription" on it instead. You could also paint a container like this, just be sure to sand the shine off of it first, or use a primer meant for plastic, and seal it when you're done so your hard work doesn't chip off.

Sometimes it's the little things that make a day super special. We don't have to do something big to show someone how much they mean to us. After a year spent together in a very small space, with no breaks or alone time, I just hope this little gesture is enough to remind my husband why he hasn't divorced me yet!


* This post contains Amazon Affiliate links

< 1 2 3 4 5 6 >